
As a software developer, I spend a lot of time using the terminal, or more properly, a “terminal emulator”. Tools like iTerm2, or PuTTY, or GNOME Terminal, or the classic xterm and rxvt are all “terminal emulators”; they take raw text and formatting instructions and interpret them to display pretty text on the screen. But if these tools which are commonly called “terminals” are actually “terminal emulators”, then what’s the actual terminal they’re emulating?
These days, most terminal emulators are really emulating xterm; it’s one of the oldest and most featureful terminal emulators, so for compatibility reasons other terminal emulators tend to follow it. But xterm’s webpage says it “provides DEC VT102 and Tektronix 4014 compatible terminals”. That is, xterm is an emulator for the VT102 terminal:
(technically, that’s a VT100, but they’re quite similar)
The Digital Equipment Corporation, or DEC for short, built many different kinds of terminals, but the VT100 was the one that really took off, and all subsequent models (the VT220, VT320, VT420, VT520 and all their variants) were backwards compatible with it. Since they were one of the oldest and most featureful families of terminals, for compatibility reasons xterm decided to follow them.
xterm (and all its more modern competitors)
emulate the VT102 (etc.) in basically the same way:
reading through the documentation,
and implementing each listed feature one-by-one.
The docs say that when the terminal receives
the sequence ESC [ 5 A it moves the cursor 5 lines up,
so as long as our terminal does the same thing,
it’s correct.
However, if you’re a modern software developer,
that should make you nervous:
confronted with a laundry-list of features,
you can expect that they almost certainly interact with each other
in surprising and difficult-to-predict ways,
and you’ll probably need a lot more documentation,
and a detailed test suite
to be confident two implementations are compatible.
Sadly, so far as I know, there is no such detailed documentation or test-suite for terminals and terminal emulators. Because they’re fundamentally about visual output, it’s quite difficult to properly test them.
Instead, they’re generally tested the old-fashioned way: running applications to see if anything looks weird. The next generation of applications are tested against the current generation of terminal emulators, the next generation of terminal emulators are tested against the current generation of applications, and so forth. This has worked out surprisingly well, but there’s a certain amount of information loss along the way. For example, the VT100 supported rendering double-width text, and xterm supports it too, but many other terminal emulators don’t, so applications don’t use it, so future terminal emulators don’t bother.
Instead of comparing each terminal emulator against previous terminal emulators, it would be neat if we could compare directly against an original VTxxx terminal. But those are extremely rare these days, and even if you want to buy one second-hand, they’re heavy and fragile.
You might have heard of MAME in the context of video-games; after all, it was originally the Multiple Arcade Machine Emulator. However, many arcade machines were built from similar components, hooked together in similar ways, so MAME wound up being a fairly generic “computer components wired together” system, and today it emulates all kinds of computers and game consoles and computerised gadgets as well as arcade machines. In particular, and relevant to our interests, it emulates the VT102. This isn’t documentation-as-feature-list implementation, like xterm or other terminal emulators: MAME uses a copy of the original firmware, and inteprets it with an emulated CPU talking to an emulated serial port and emulated video hardware. This is about the best recreation of a VT102 you can get without taking up half your desk.
To use a MAME-emulated VT102, you’ll need a couple of things:
apt install mameOnce you have all these things, it’s time to start up MAME. Here’s the command-line to use:
mame -biospath path/to/firmware/dir -window -nomouse -vol -15 vt102 -rs232 pty
In this command-line:
mame is the command to run-biospath path/to/firmware/dir means that
MAME will read the VT102 firmware
from path/to/firmware/dir/vt102.zip.-window means MAME will draw its output in a window
like a well-behaved terminal emulator,
instead of taking over the full screen
(which is a sensible default for MAME’s normal arcade-game use-case)-nomouse means MAME will not grab exclusive control of the mouse
(since the VT102 doesn’t support mouse control, this is fine)-vol -15 means the volume is adjusted to a level of -15 dB.
The VT102 has a pretty aggressive beeper,
and it’s going to be beeping a lot,
so turning down the volume is important.vt102 is the system we want MAME to emulate-rs232 pty means that the other end of the VT102’s serial port
should be connected to a PTY,
the emulated serial port the kernel provides
for terminal emulators to communicate with the applications inside them.Once you launch MAME, you’ll get a warning screen about the emulation being incomplete. Hit a key to get past it. Next, there’s an information screen about the hardware being emulated. Hit a key to get past that too. Finally, the emulated VT102 should boot up. At first it will say “Wait” in the top left, then you’ll get some beeping, and you’ll see something like this:
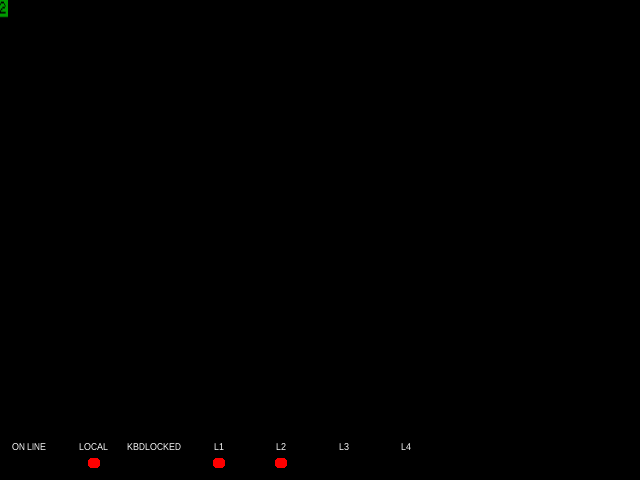
That 2 in the top left means that
the hardware needs to be configured.
Fair enough,
it hasn’t been powered on for forty years.
In order to configure the VT102, you’ll need to examine a diagram of the VT102 keyboard. See those labels above the numbers at the top of the keyboard? Those tell you what the number keys do in the setup screen.
You’ll also notice a big “SET UP” key at the top-left of the keyboard. Your PC keyboard doesn’t have a SET UP key, but MAME maps it to the F5 key by default. Press F5, and you should enter “SET-UP A” mode:
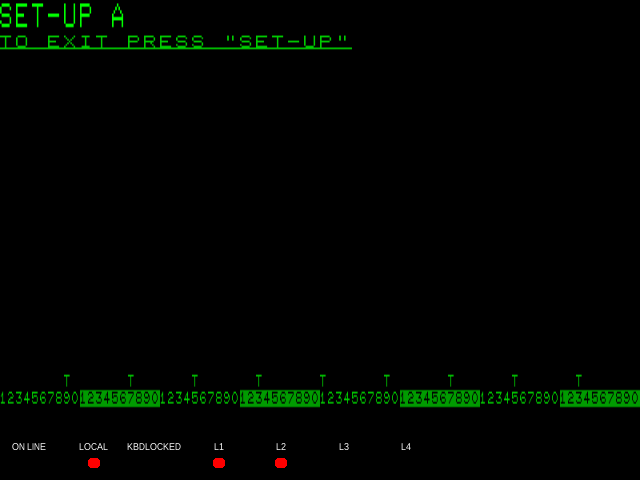
There’s many things you can configure in the SET-UP screen, including such classics as “light text on dark background or dark text on light background”, “should the cursor be a block or an underline”, and “should the keyboard click when I type a key”. However, there’s only one thing we strictly need to change to get things working.
At the bottom of the MAME window, you’ll see two labels, “ON LINE” and “LOCAL”. By default, “LOCAL” is lit, meaning that typing at the keyboard goes straight to the display, not to the remote computer. On the keyboard diagram, you’ll see the “4” key is labelled “LINE/LOCAL”. Now that we’re in SET-UP mode, press 4 to switch to “ON LINE” mode.
Once you’re done, press Shift-S to save your settings. The screen should clear, and display “Wait” in the top left for a second or two, then return you to the SET-UP A screen. Note that the VT102 is an exclusively QWERTY machine — if you’re using another keyboard layout, you’ll need to press the key that produces S on a QWERTY keyboard.
Finally, press F5 again to leave SET-UP mode.
Way back when we launched MAME,
we gave it the command line option -rs232 pty
which caused MAME to create a PTY device
to communicate with the outside world.
MAME is at one end of the PTY,
we connect a shell (or any other app) to the other end,
and presto! the app is running inside the emulated VT102.
The question is,
where is this PTY?
MAME will tell us,
but we have to fight it a little first.
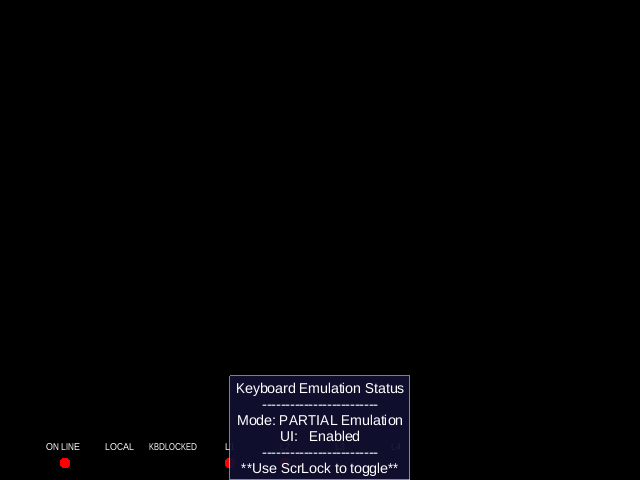
Traditionally, to bring up MAME’s user interface, you press Tab. MAME is normally used to emulate video-games, which typically don’t have a Tab key, so this works well — but the VT102 does have a Tab key, and we’d like to be able to use it. MAME’s solution is to support multiple keyboard modes: by default MAME starts in “FULL Emulation” mode, where every key is handled by the VT102; if you press the toggle-keyboard-emulation key, it switches to “PARTIAL Emulation” mode, where most keys are handled by the VT102 but some are handled by MAME itself. Traditionally, the toggle-keyboard-emulation key is the Scroll Lock key, but on my machine it was the Insert key for whatever reason. Play around with rarely-used keys on your keyboard, and eventually you should see a message about PARTIAL Emulation:
Once you’re in PARTIAL Emulation mode, you can press the same key to get back to FULL Emulation, or press the Tab key to open MAME’s emulation menu:

In this menu, the most important item is “Pseudo terminals”, about a third of the way down. You can use the cursor keys, Enter, and Escape to navigate the menu. If you highlight “Pseudo terminals” and press Enter, you’ll be taken to the “Pseudo terminals” sub-menu, which shows you the path to the terminal device connected to the VT102’s emulated serial port:
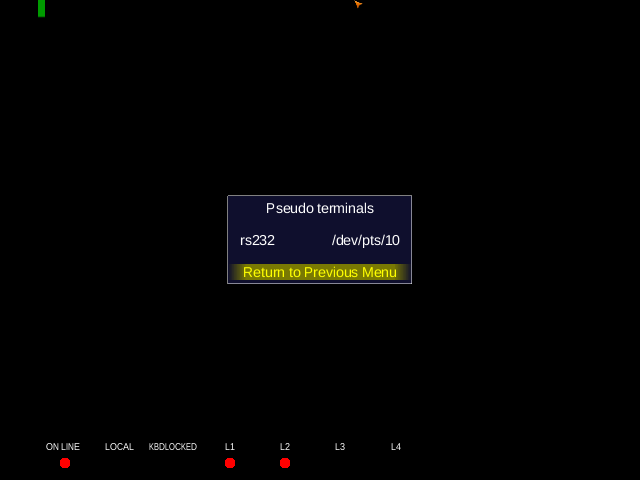
Make a note of the path to the terminal device, then press Tab again to close MAME’s menu, and press the keyboard-mode key again to switch back to FULL Emulation mode.
As I mentioned earlier, the PTY is the interface between the terminal and the application running inside it. To use a physical VT102, you connect it to a physical serial port on your computer, and (like any device) your operating system has drivers and configuration for it. When people stopped using terminals and started using terminal emulators, PTYs were invented to be a kind of fictional serial port, that supports the same configuration as a real serial port but ignores most of it.
Most, but not all. When most terminal emulators create a PTY, they give a standard, sensible configuration. MAME, for whatever reason, does not — at least, not in the version I’m using. Luckily, we can use the standard Unix serial-port-configuration tool on the PTY to match the configuration the VT102 expects. Here’s the command-line to use:
stty sane cols 80 rows 24 erase ^H ixon < /dev/pts/10
In this command-line:
stty is the command to runsane applies sensible, sane defaults^C to send an interrupt signal,
and it translates the VT102’s Return key
(which sends ^M, the “carriage return” control code)
into the ^J control code that Unix programs expectcols 80 tells applications that
the terminal displays 80 characters per linerows 24 tells applications that
the terminal displays 24 lines of texterase ^H says that the key to erase the previous character
generates ^H, the “backspace” control code^?
instead of a Backspace key that sent ^Hixon means that when the terminal is receiving
more data than it can handle,
it will send ^S to make the kernel pause sending data,
and send ^Q when the backlog is clearing and it’s ready for more< /dev/pts/10 tells stty to configure
the terminal that MAME is connected to,
not the one where you’re running sttyThe terminal is waiting, the PTY is configured, it’s time to launch a shell. Here’s the command-line to use:
TERM=vt102 LC_ALL=C COLUMNS=80 LINES=24 /bin/sh </dev/pts/10 >/dev/pts/10 2>/dev/pts/10
In this command-line:
TERM=vt102 tells applications they’re running inside a VT102,
so they can limit their output
to match the terminal’s graphical limitationsLC_ALL=C makes C applications use the C locale,
so they should stick to pure ASCII output
(which is basically all the VT102 understands)COLUMNS=80 LINES=24 tells applications the dimensions of the terminal/bin/sh is the shell we want to run/bin/sh is usually more primitive,
which feels appropriate for this kind of historical recreation